Using Sanction Scanner with HubSpot
The Sanction Scanner HubSpot integration enables you to perform compliance screenings directly within HubSpot without switching between platforms. This setup allows you to check Contacts and Companies against global sanction lists, politically exposed persons (PEPs), and the most up-to-date global databases in just a few clicks.
By connecting the two systems, compliance and customer-facing teams can operate in a single environment while ensuring regulatory requirements are met. The integration is simple to install, easy to configure, and flexible enough to align with your organization’s compliance workflows.
With this guide, you will learn how to connect your Sanction Scanner account to HubSpot, adjust integration settings, and run your first screening.
1. Prerequisites
Sanction Scanner account with API access – Needed to connect HubSpot with Sanction Scanner and run screenings. If you don’t have a Sanction Scanner account yet, you can create one for your organization at 🔗Plans & Pricing.
HubSpot account with the right permissions – Needed to install and configure the integration. You must be a Super Admin or have App Marketplace access permission to install apps from the HubSpot Marketplace. For more details, see 🔗Install Apps in the HubSpot Marketplace.
2. Connect Sanction Scanner with HubSpot
Log in to your HubSpot account.Start by signing in to the HubSpot account where you want the integration to run. |
|
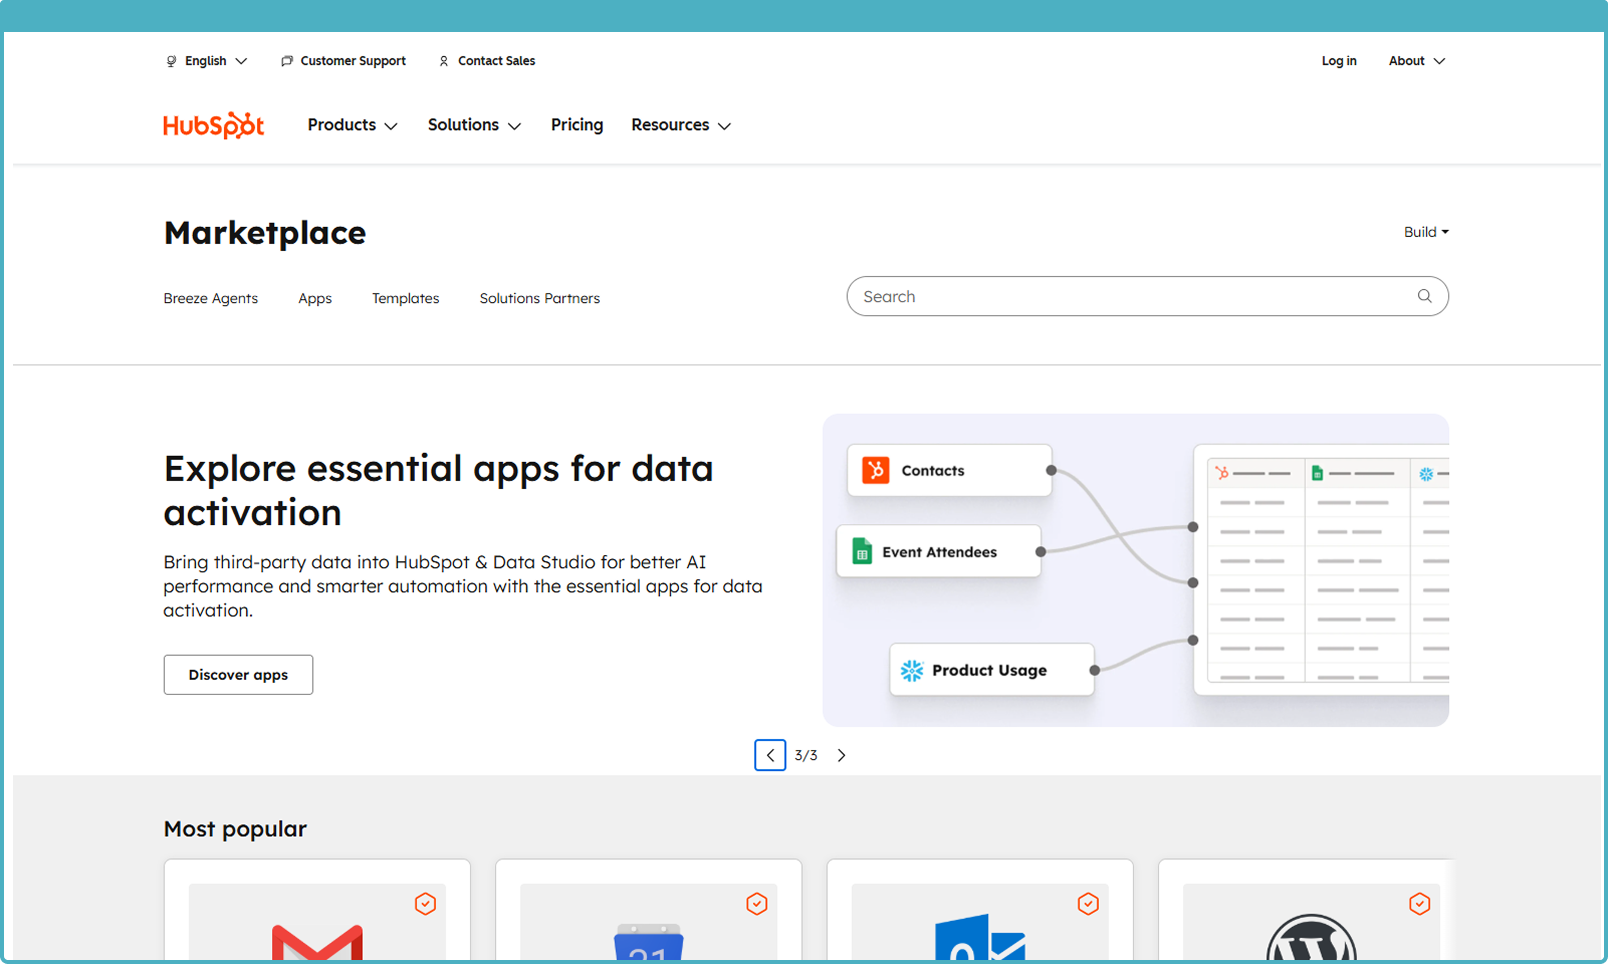
Navigate to HubSpot’s MarketplaceThe HubSpot Marketplace is where you can find and install external integrations like Sanction Scanner. |
|
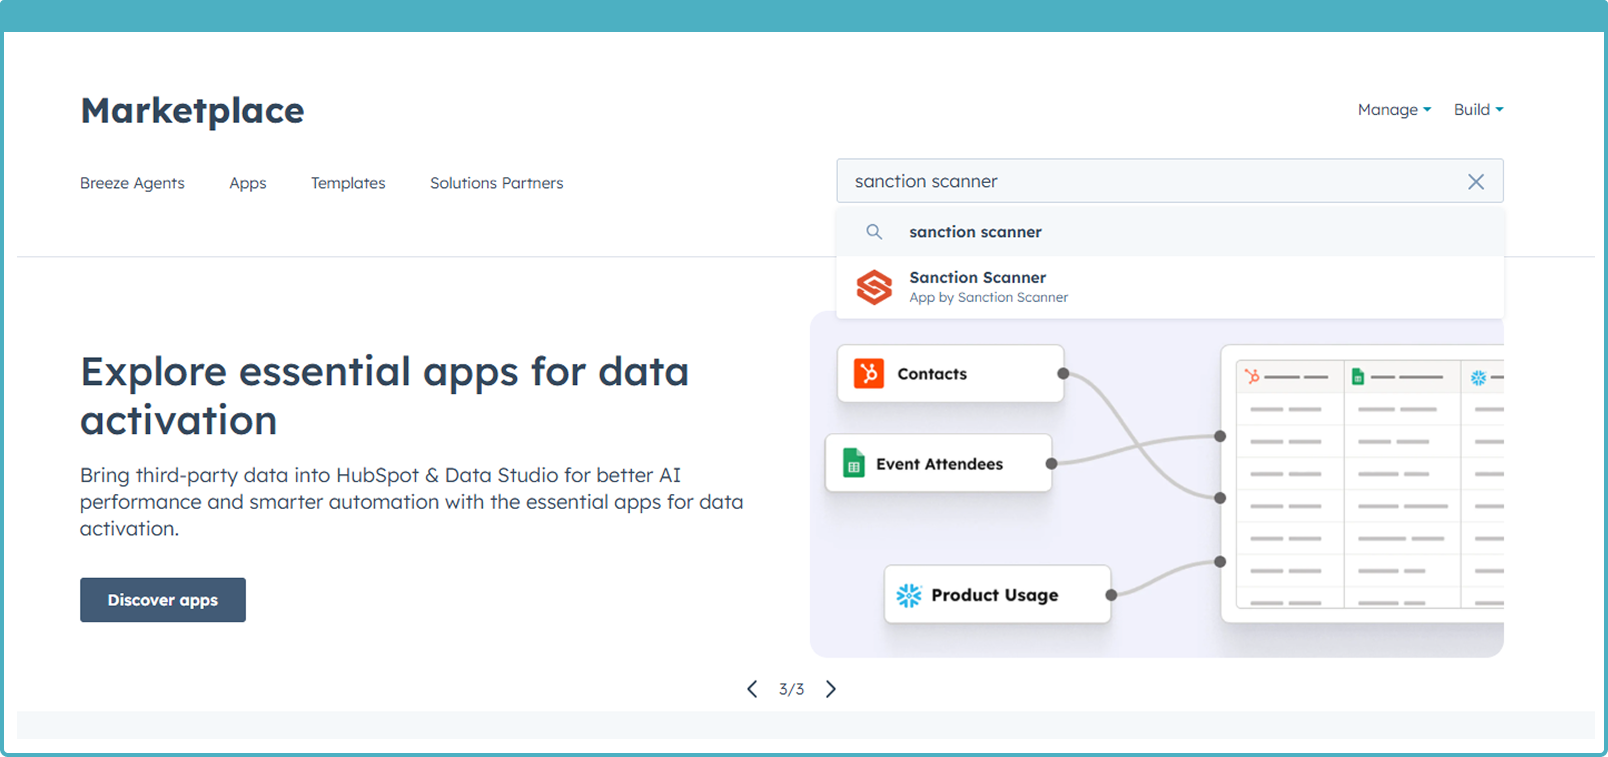
Search for Sanction Scanner and click Install App.Use the search bar to find Sanction Scanner, then select it to begin installation. |
|
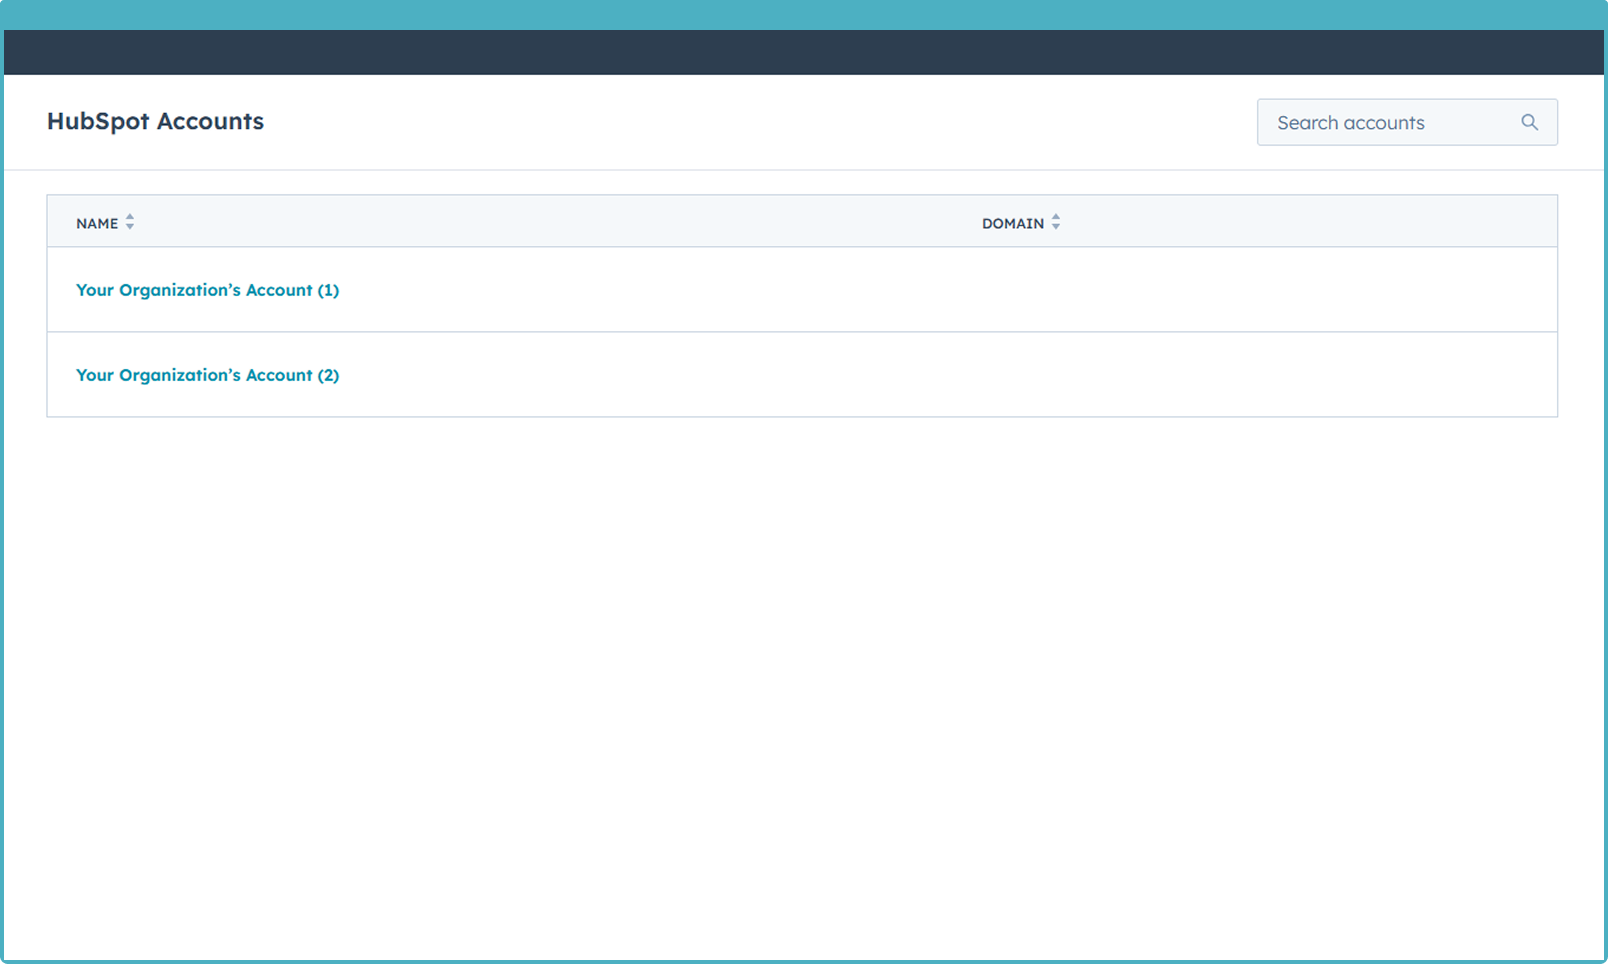
You will be redirected to Sanction Scanner’s authentication page.HubSpot will open a secure page where you select your organization. This step is required to verify your Sanction Scanner account and ensure that the correct organization is linked. By completing this authentication, HubSpot can securely connect to Sanction Scanner. |
|
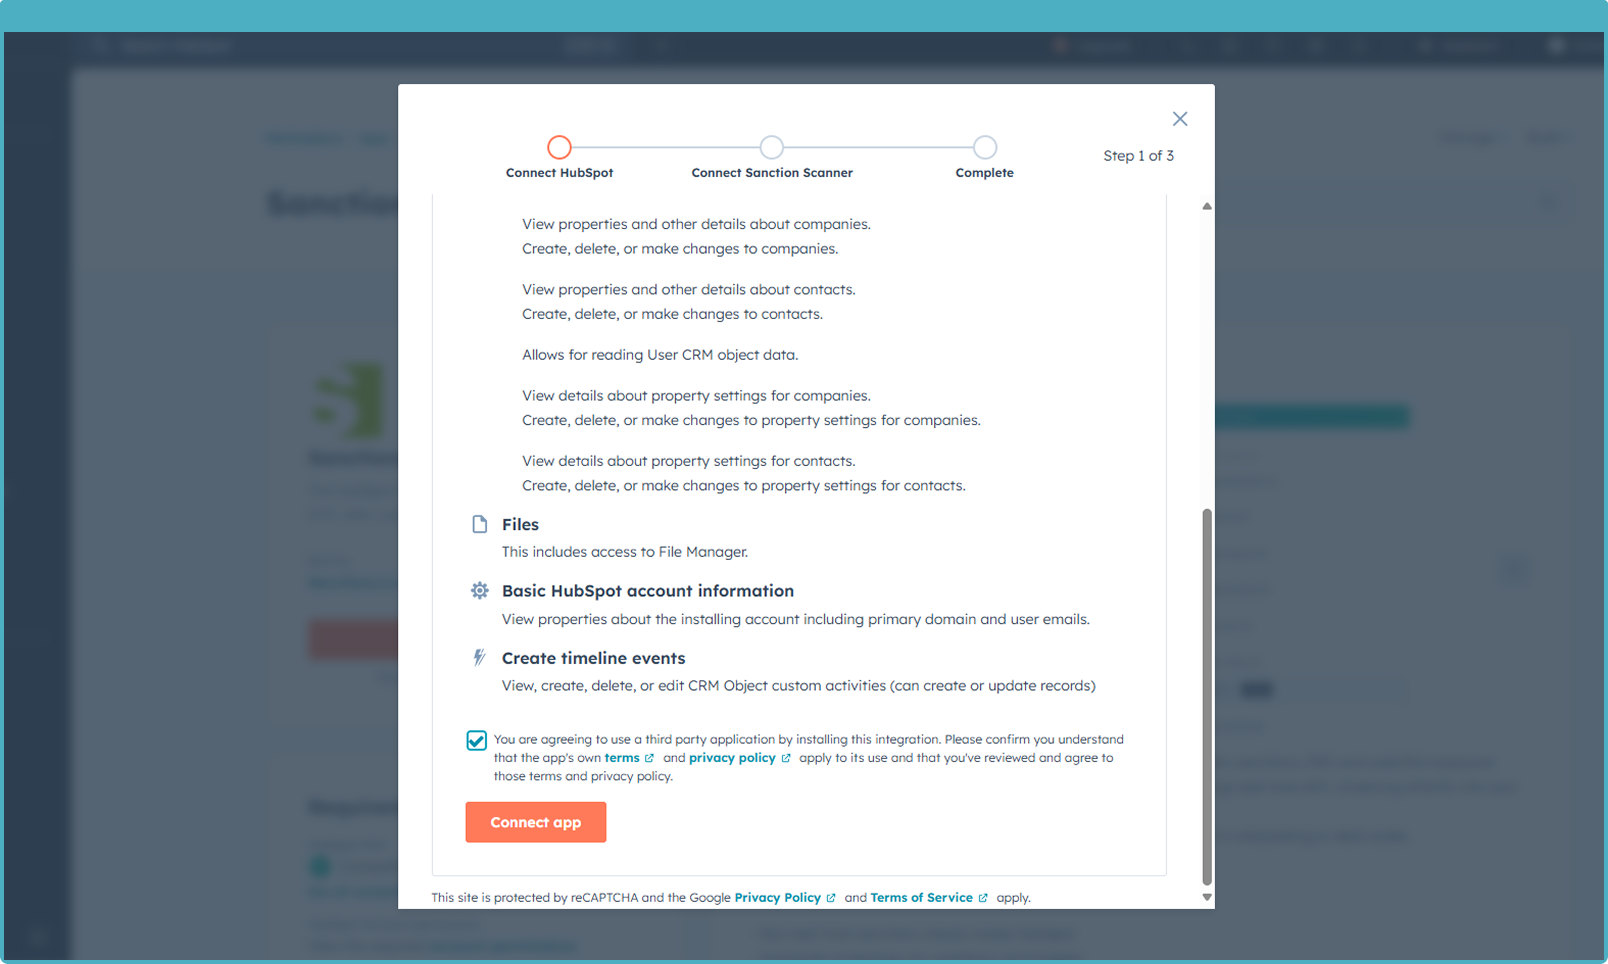
Review and grant required permissions.HubSpot will show the permissions Sanction Scanner needs. Review them and click Allow to continue. These permissions are required so the app can read and screen your Contacts and Companies and then write back the match status into their profiles. Without these permissions, screenings and results cannot be displayed in HubSpot. |
|
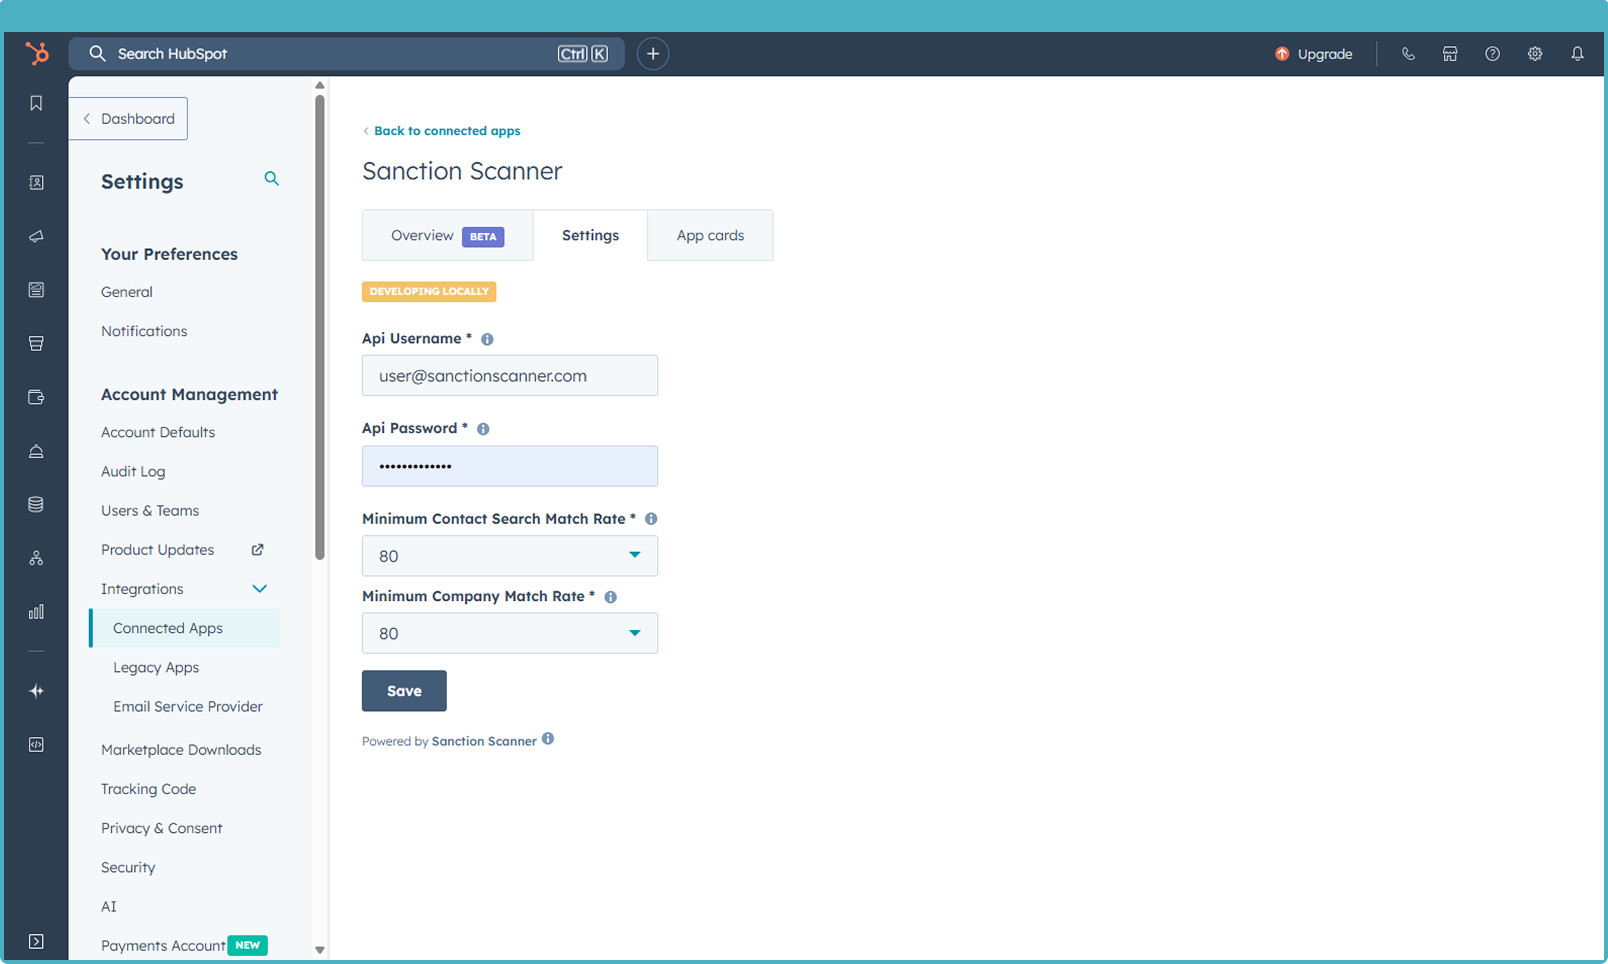
Once connected, you’ll return to HubSpot and see Sanction Scanner under Connected Apps.Next, enter your Sanction Scanner API Key and confirm access. The API Key securely links your Sanction Scanner account to HubSpot so screenings can run inside HubSpot. After that, choose the fuzzy matching rate for your “Contact” and “Company” screenings to define how strict or flexible the matching process should be. |
|
Great! You’ve successfully installed and configured the Sanction Scanner app in your HubSpot CRM. Now let’s continue with the next step.
3. How to Use
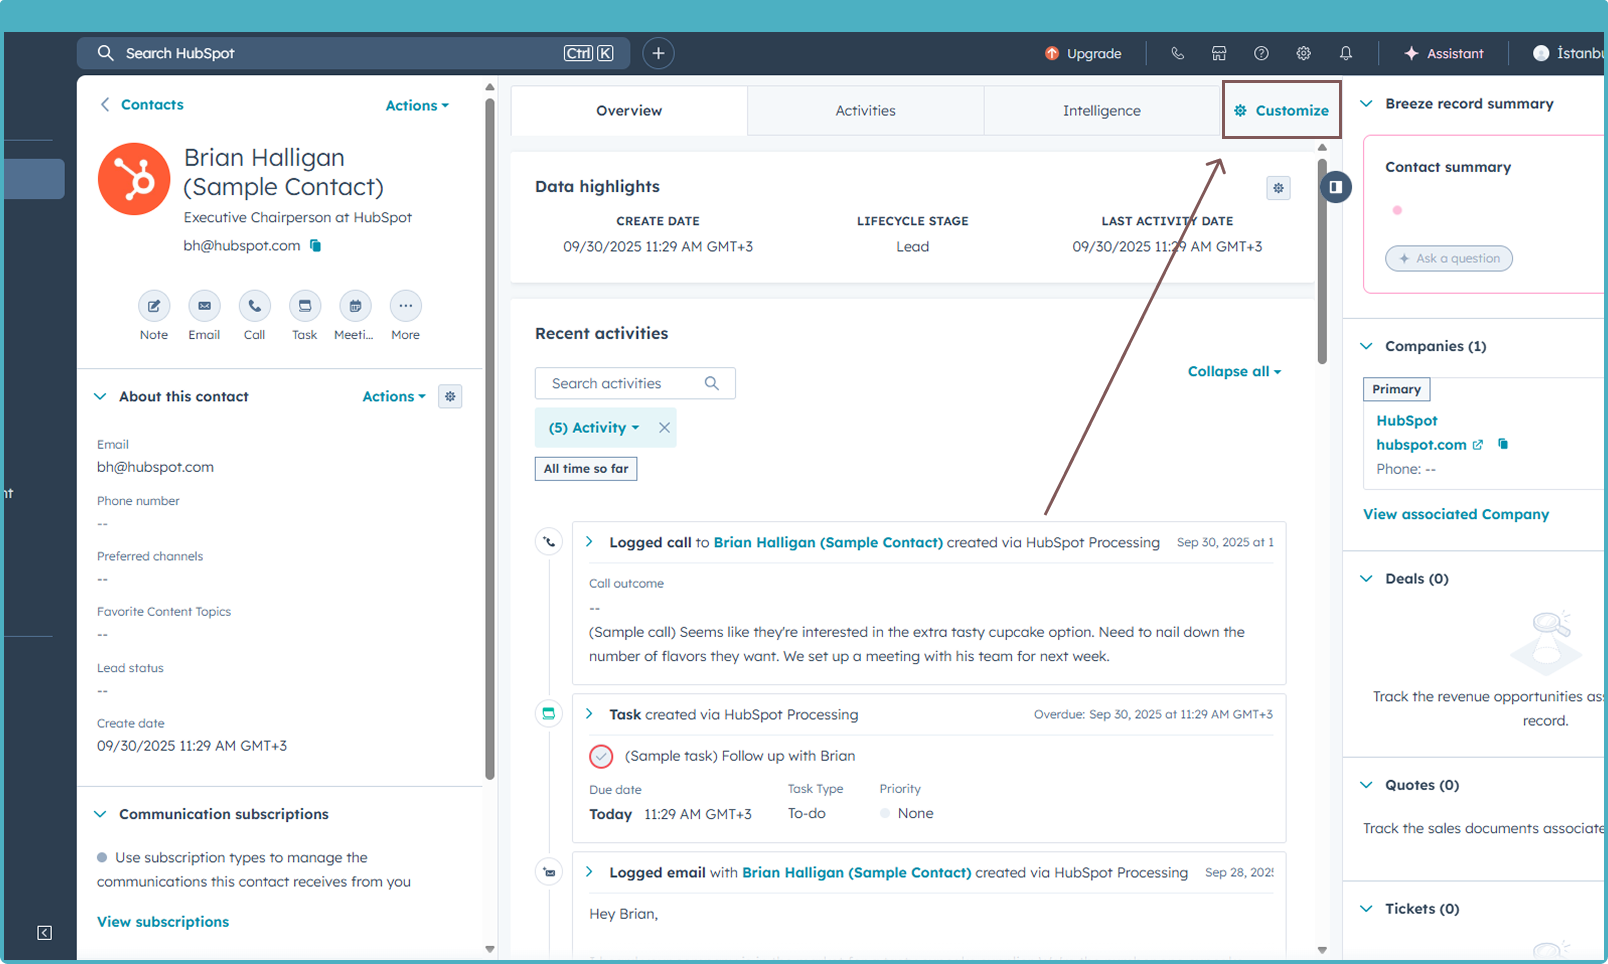
Go to any Contact or Company record in HubSpot.Go into any Contact or Company profile. On the right-hand panel, click the Customize link (shown with the arrow in the screenshot). |
|
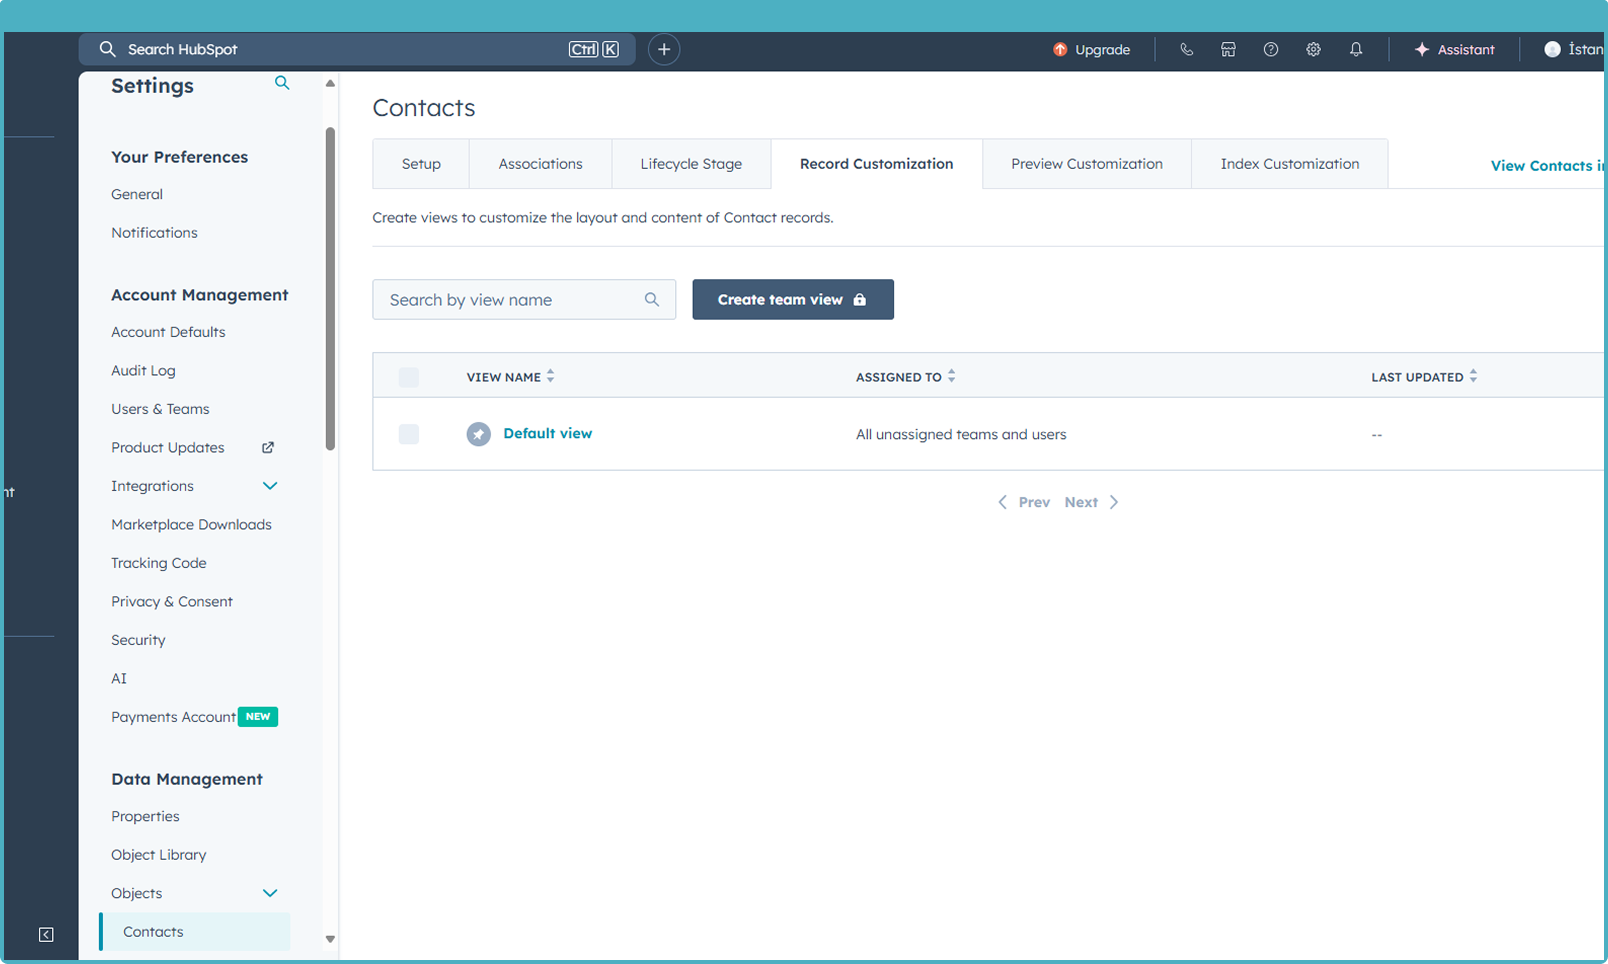
Select the default view from the Record Customization panel.In the customization menu, choose the Default view option to set how Sanction Scanner will appear on your Contact or Company records. |
|
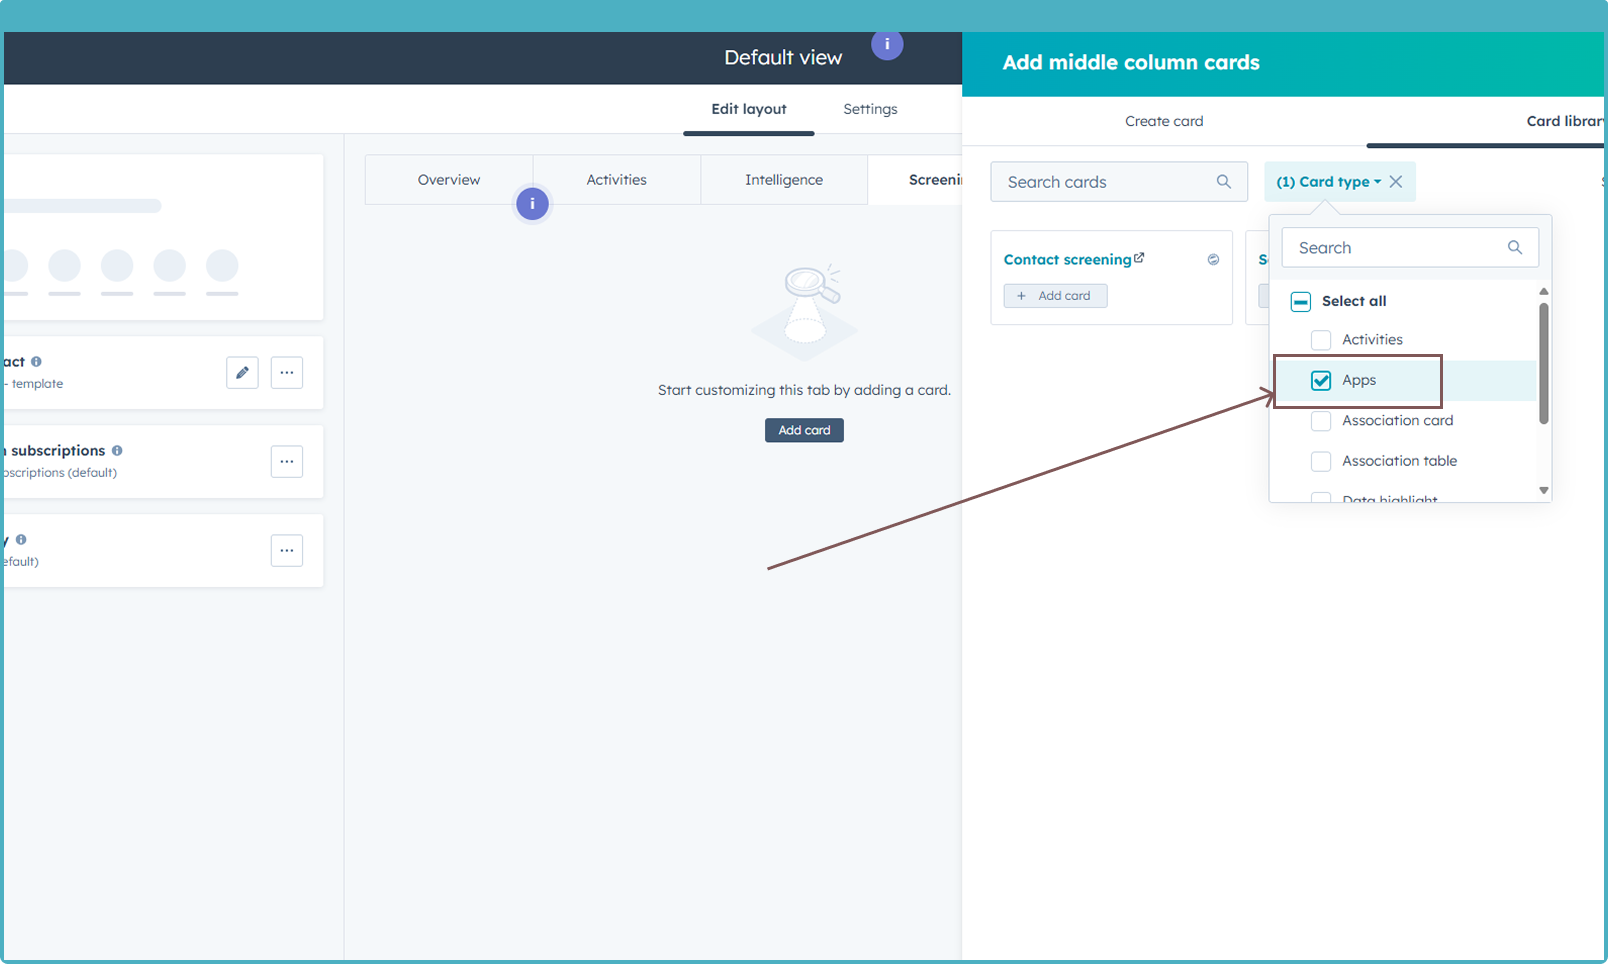
Add a tab to the default view (or to your custom view).From the Record Customization panel, create a new tab in the Default view or in your own custom view. This tab will host the Sanction Scanner widget for screenings. |
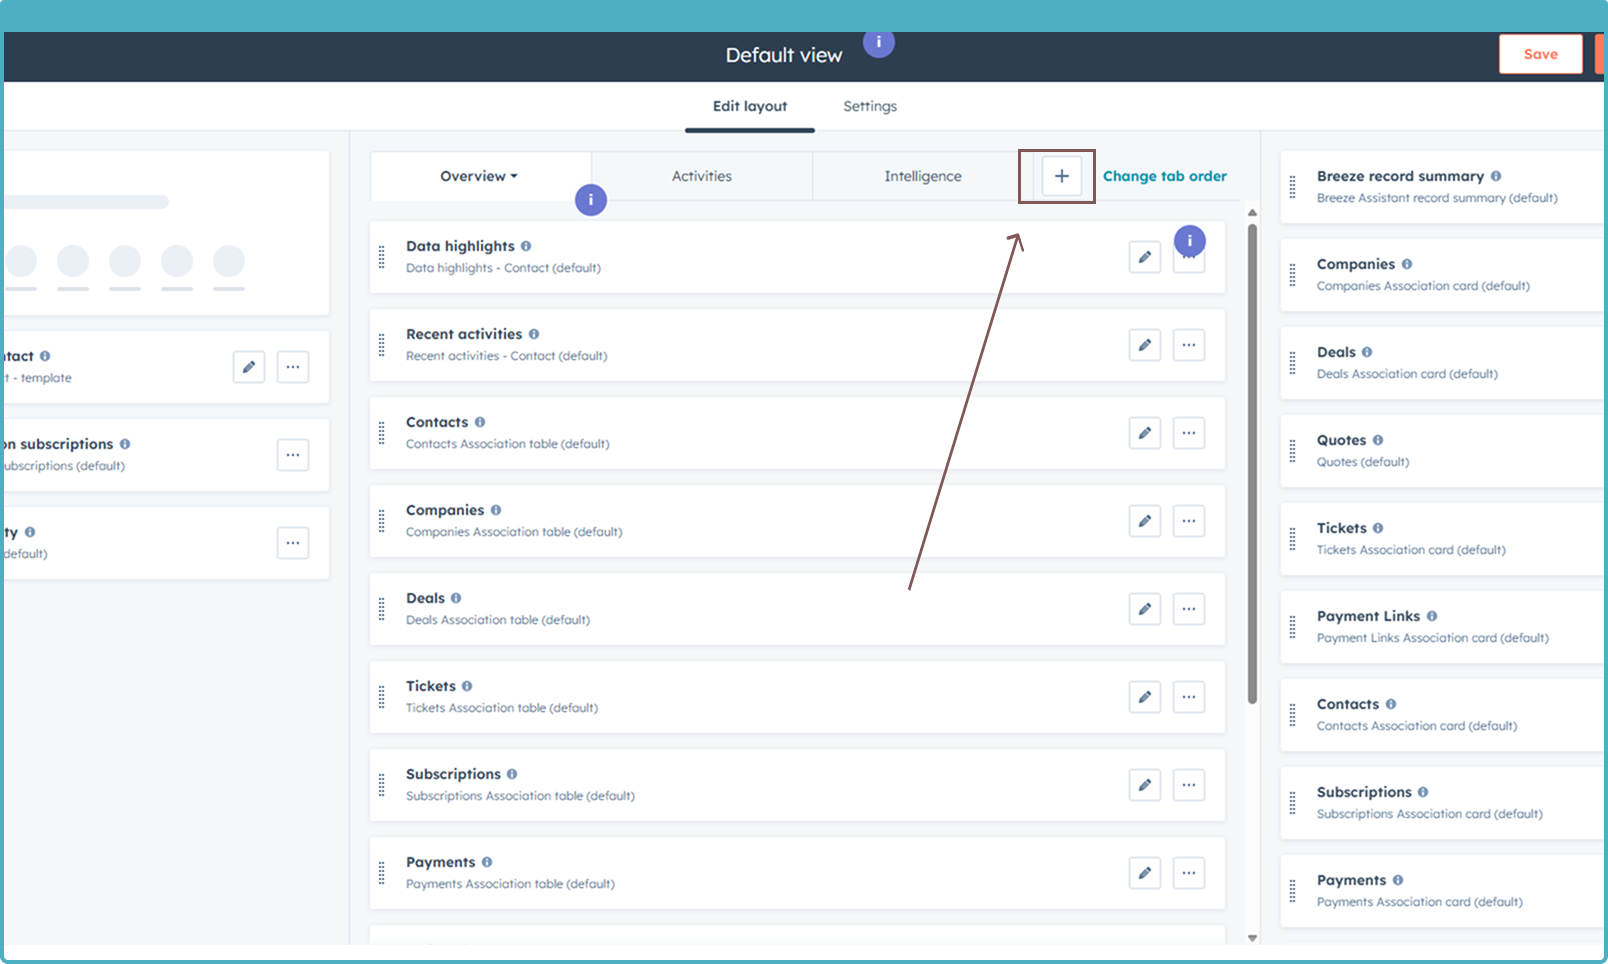
|
Add Sanction Scanner from the App Card and save your view.In the App Card section, select Sanction Scanner to add it to your tab. Once added, click Save to finalize your view. |
|
Using Sanction Scanner with Salesforce
The Sanction Scanner Salesforce integration allows you to perform compliance screenings directly within Salesforce without switching between platforms. You can screen Leads, Contacts, and Accounts against global sanction lists, politically exposed persons (PEPs), and the most up-to-date global databases directly inside your Salesforce workspace
By connecting the two systems, compliance, risk, and customer-facing teams can work seamlessly within Salesforce while meeting all regulatory requirements. The setup is easy to install, simple to configure, and flexible enough to match your organization’s compliance workflows.
This guide explains how to connect your Sanction Scanner account to Salesforce, configure the integration, and perform your first screening.
1. Prerequisites
Sanction Scanner account with API access – Needed to connect Salesforce with Sanction Scanner and run screenings. If you don’t have a Sanction Scanner account yet, you can create one for your organization at 🔗Plans & Pricing.
Salesforce account with the right permissions – Needed to install and configure the integration. You must have the “Download AppExchange Packages” permission. Only users with this permission can install applications from the Salesforce AppExchange. For more details, see 🔗Install Apps in the Salesforce Marketplace.
2. Connect Sanction Scanner with Salesforce
Log in to your Salesforce account.Start by signing in to the Salesforce account where you want the integration to run. |
|
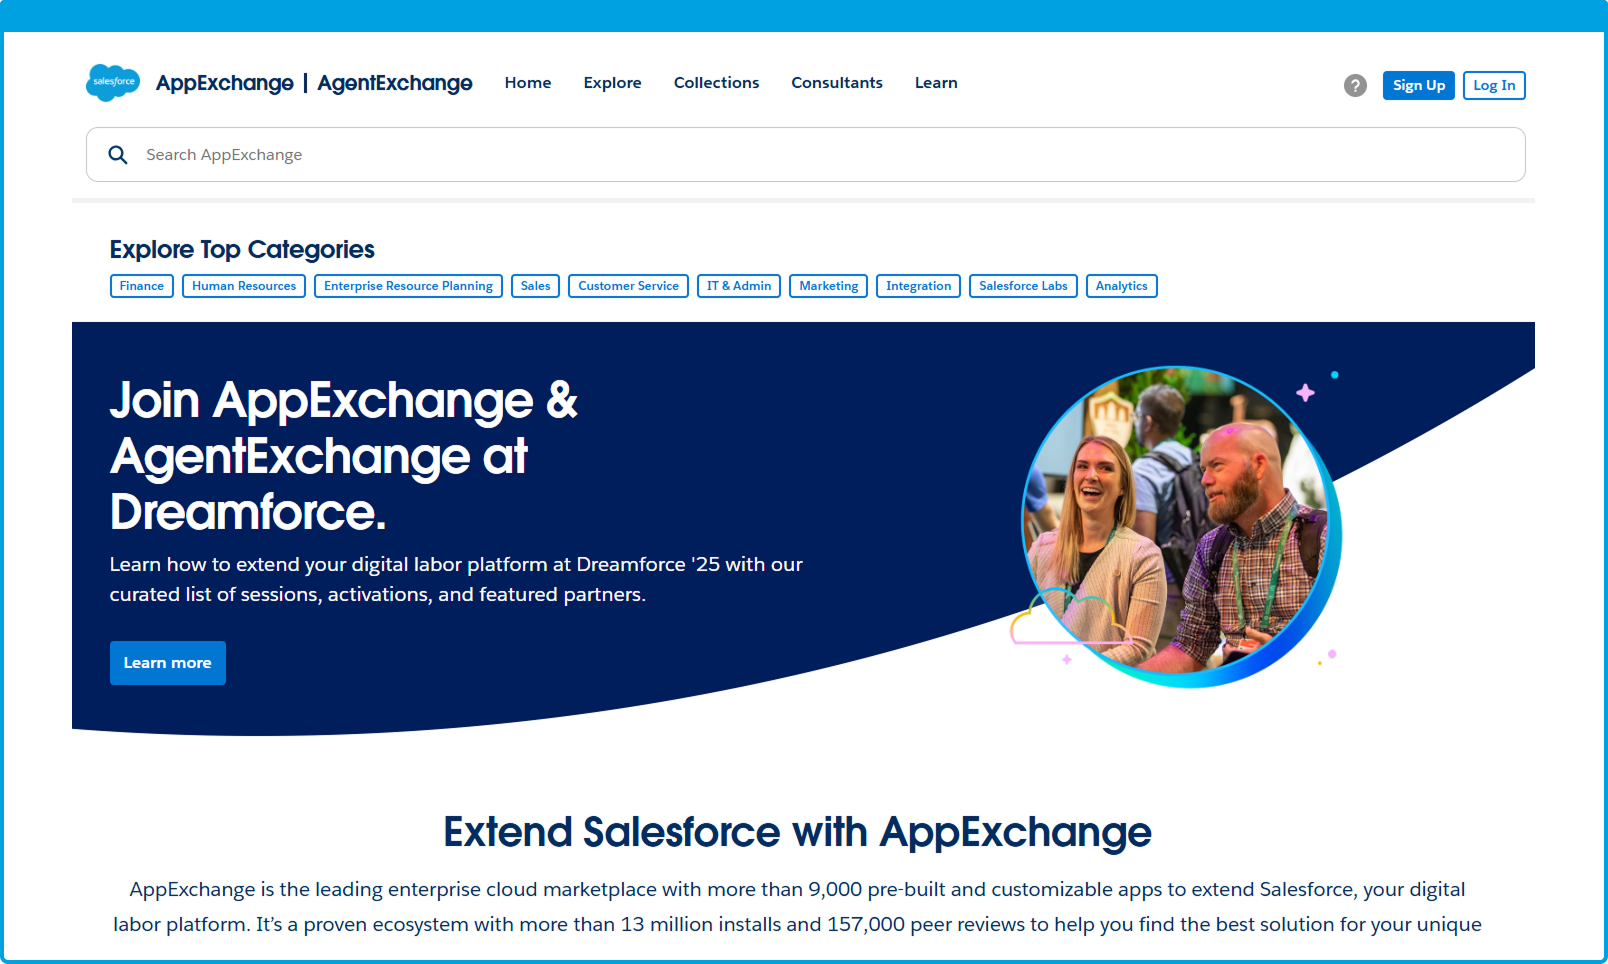
Visit Salesforce’s AppExchange MarketThe Salesforce's AppExchange Market is where you can find and install external integrations like Sanction Scanner. |
|
Search for Sanction Scanner and click “Get It Now”Use the search bar to find Sanction Scanner, then select it to begin installation. |
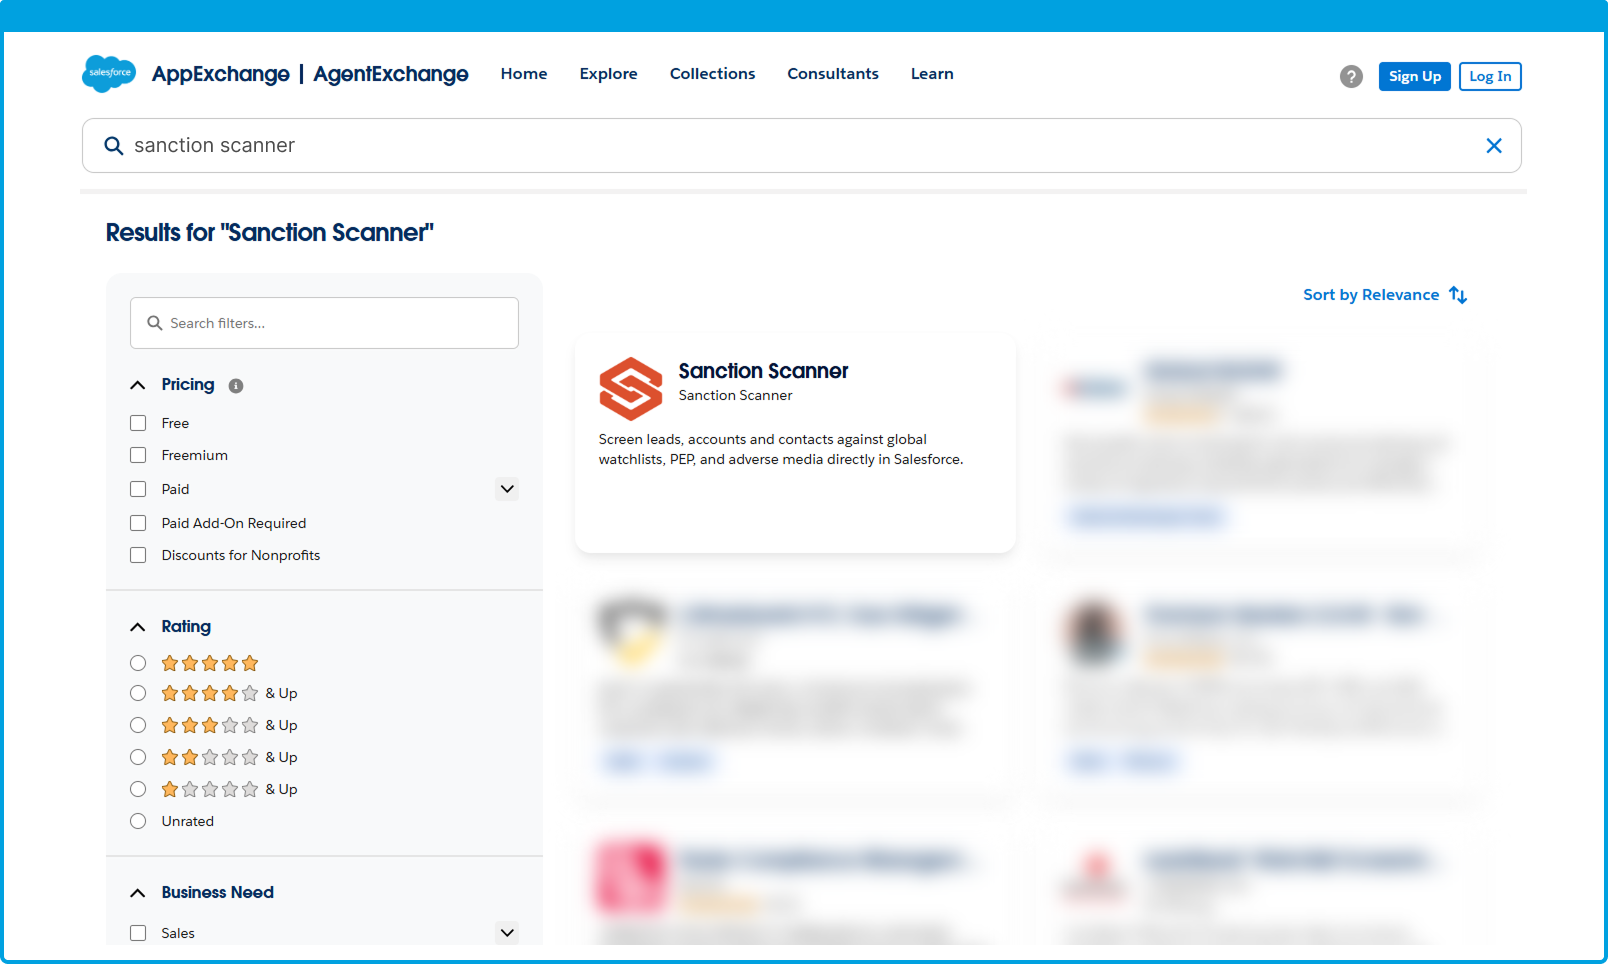
|
You will be redirected to the installation details page.Choose the installation option that fits your needs:
|
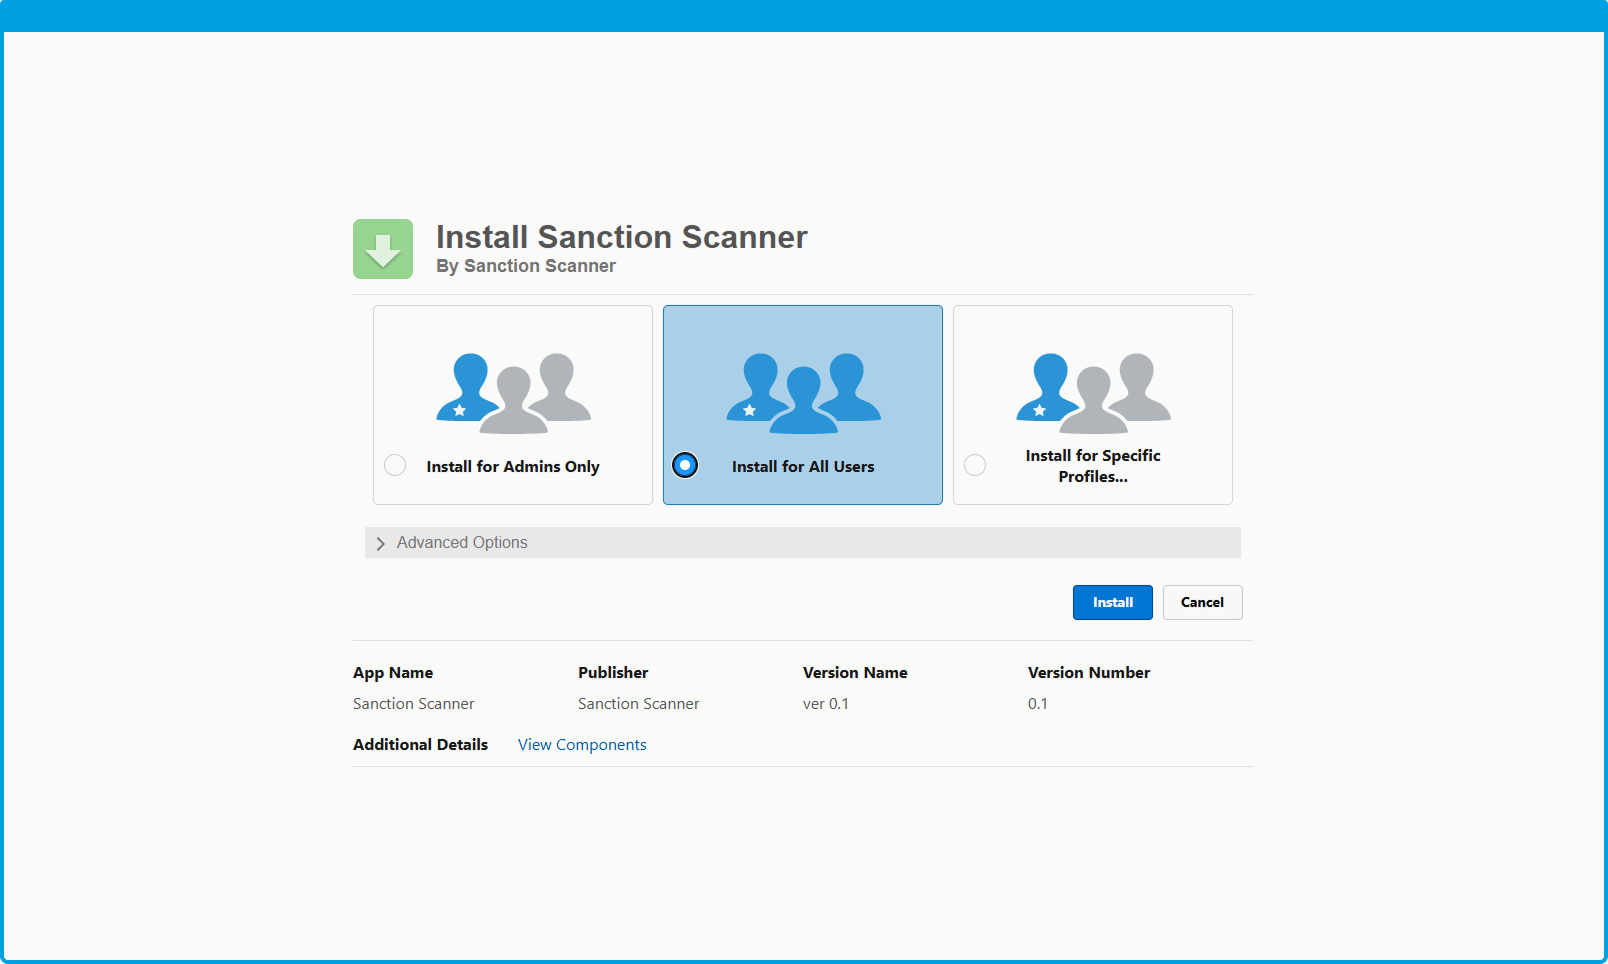
|
Grant access and complete installationSalesforce will display the permissions required by the Sanction Scanner app. Review and click “Grant Access” to continue. |
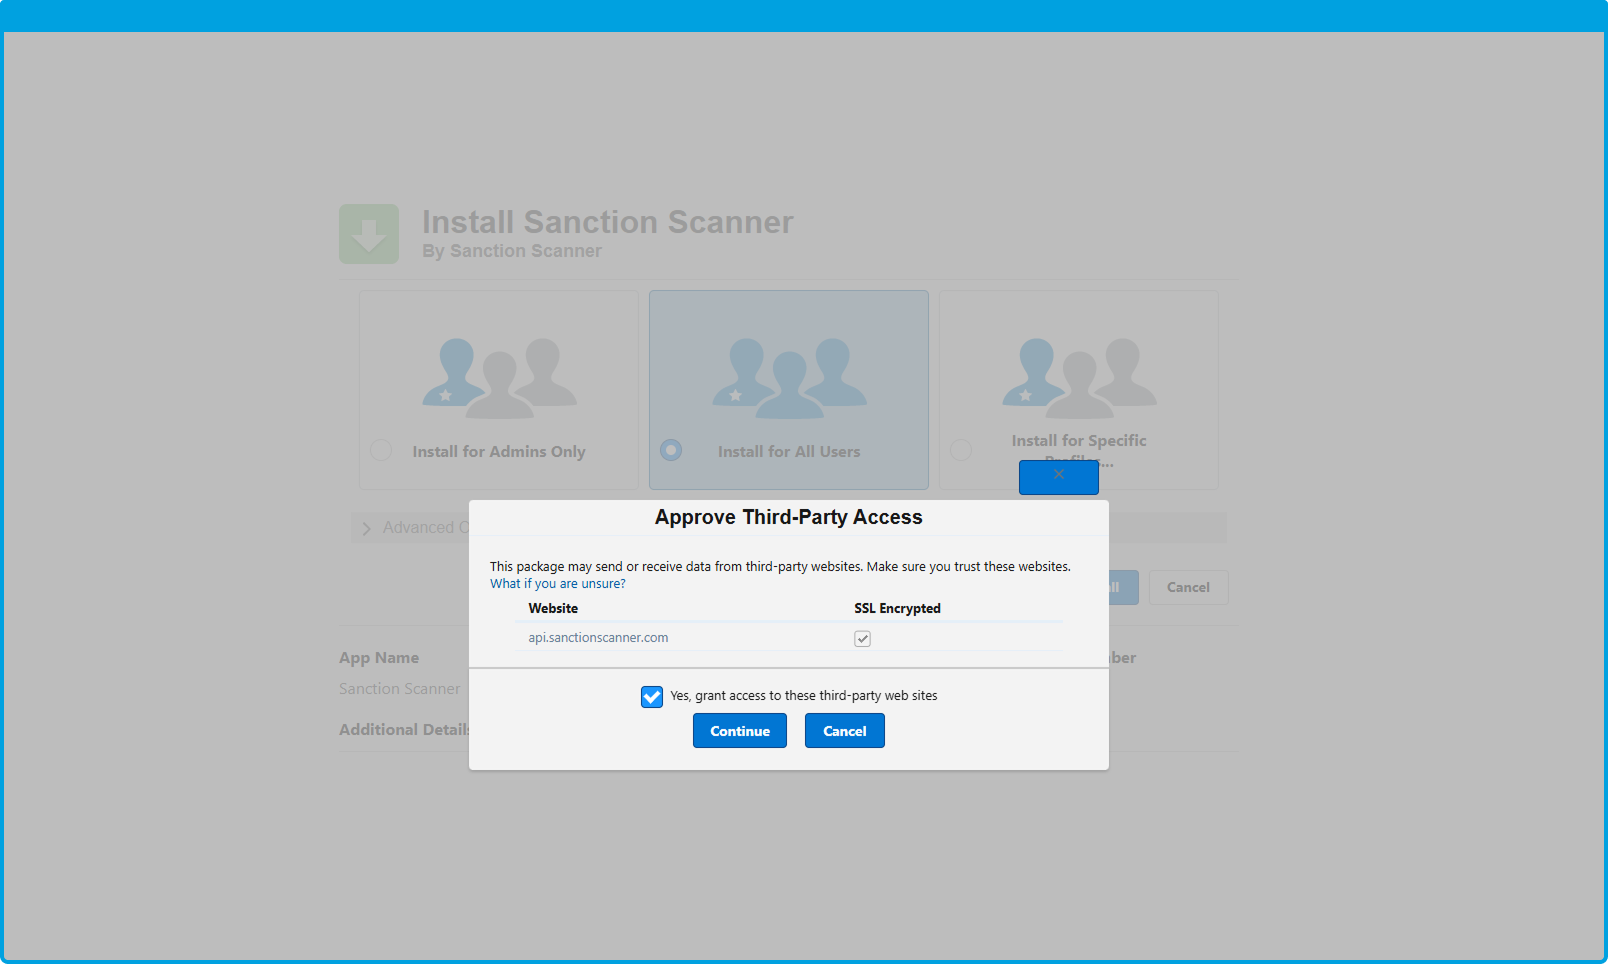
|
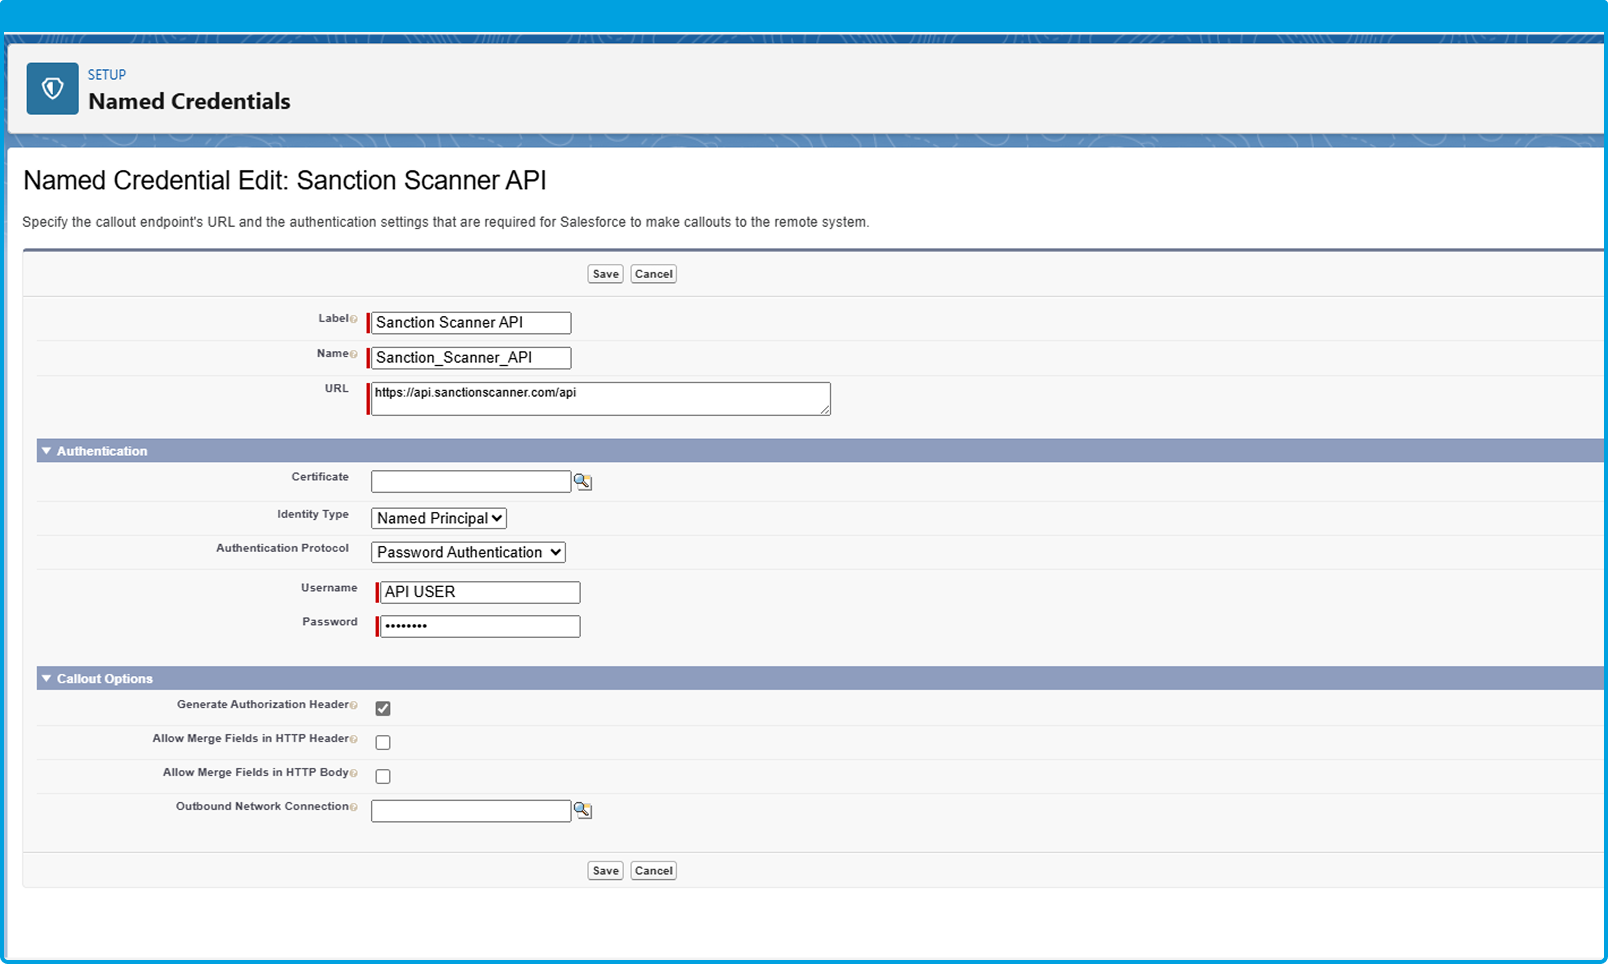
Configure named credentialsAfter installation, you will be redirected to the Installed Packages page. You will see Sanction Scanner listed among the installed apps. In the Salesforce Setup, open the Setup menu. On the left sidebar, go to Security → Named Credentials. Alternatively, type “Named Credentials” into the Quick Find search box at the top of the Setup menu. Find Sanction Scanner in the list of Named Credentials and click on it to open the setup screen. Click Edit, then enter your Sanction Scanner API User and API Password in the related fields. Save your changes to complete the configuration. |
|
Great! You’ve successfully installed and configured the Sanction Scanner app in your Salesforce. Now let’s continue with the next step.
3. How to Use
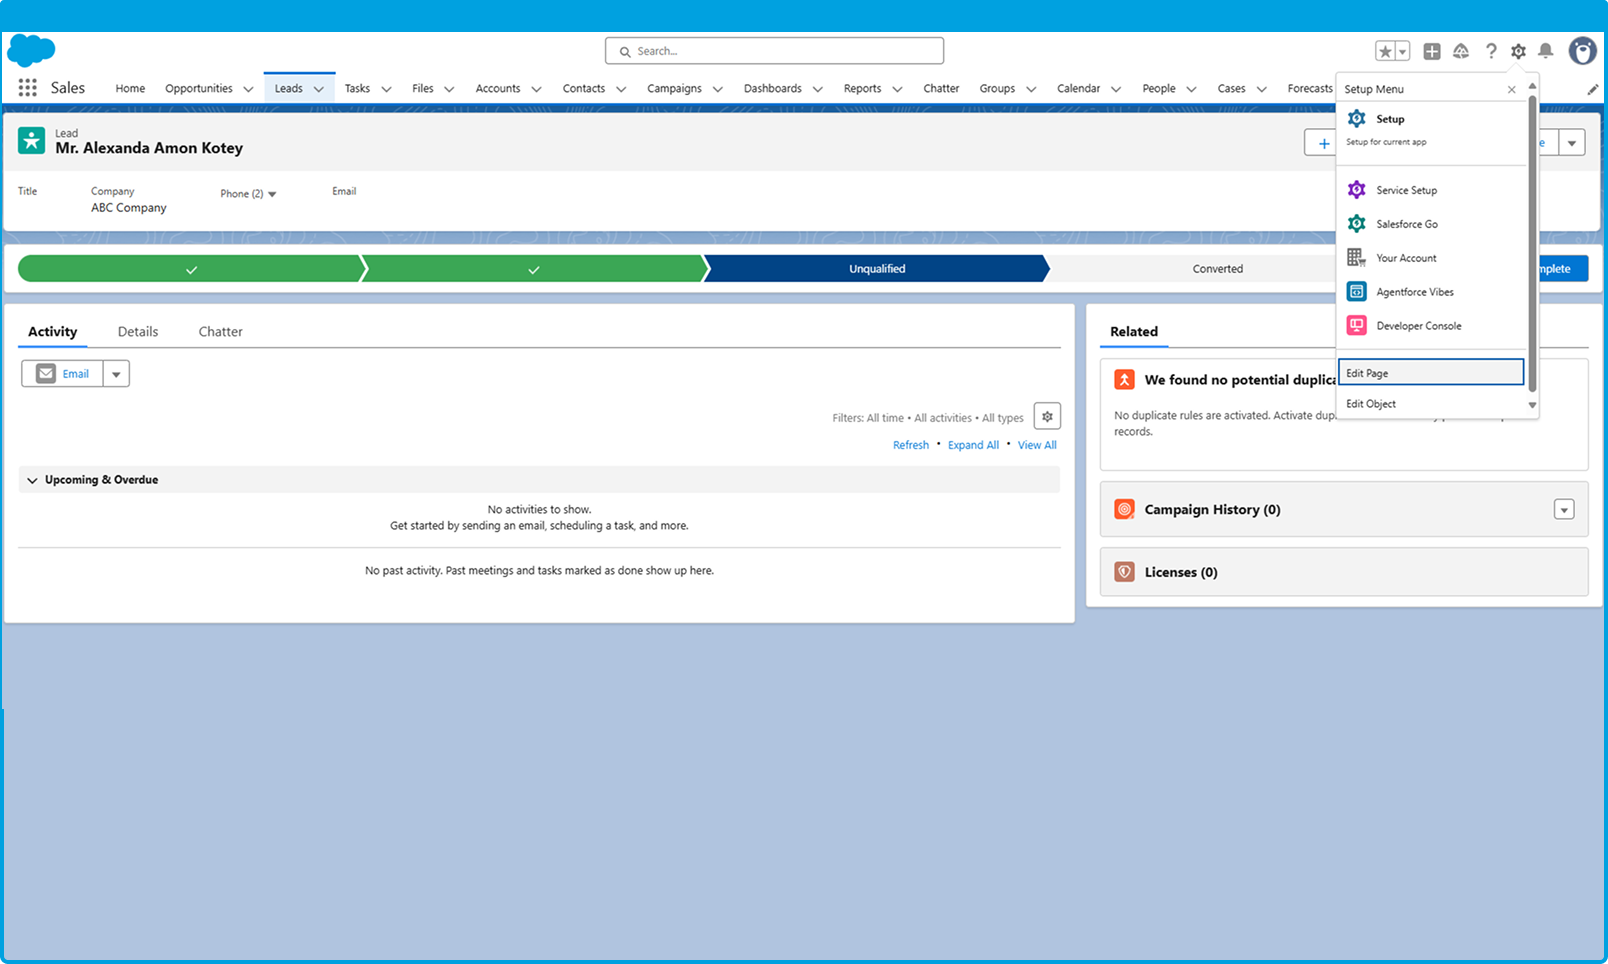
Go to any Lead, Contact or Account record in Salesforce.Go to any Lead, Contact, or Account record. In the top-right corner of Salesforce, click the gear icon, which opens the Setup menu. From the dropdown, select “Edit Page” to customize the layout. |
|
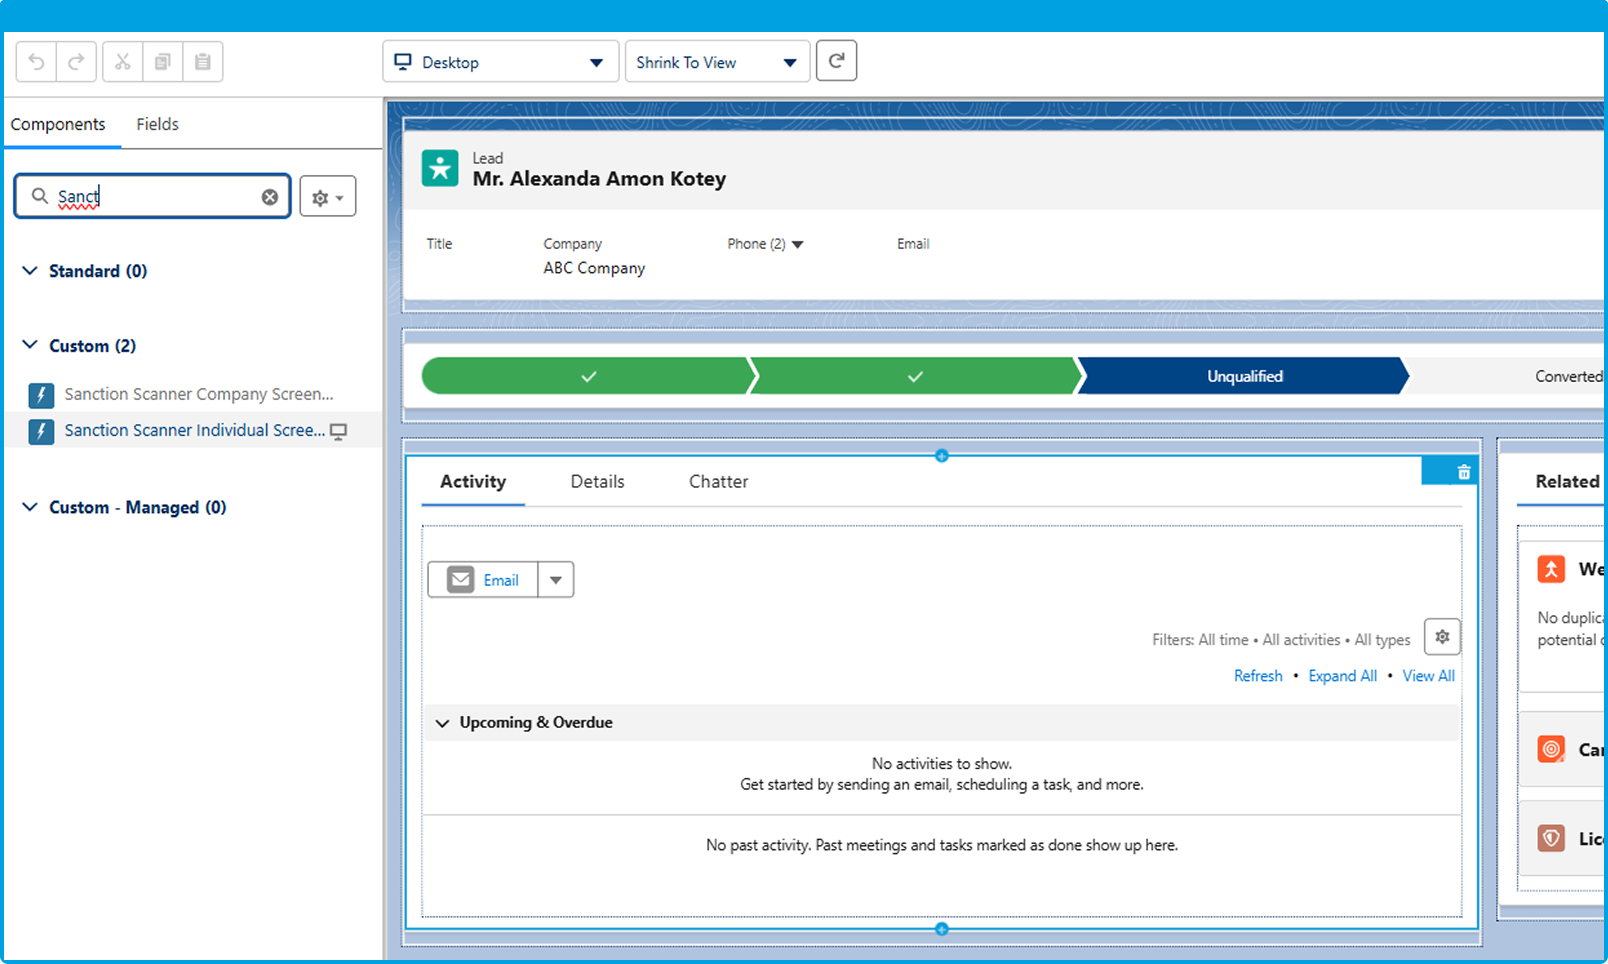
Add a component to the default view (or to your custom view).On the left sidebar, use the search bar to find Sanction Scanner. In the component list, youwill see Individual and/or Company components available under Sanction Scanner Drag and drop the desired component onto the page layout where you want it to appear. With these two components, you can perform compliance screenings directly in Salesforce. Use the “Individual Screening” component to screen a person, and the “Company Screening” component to check their related or associated organization. |
|